How to Get Started

1

Create a new group

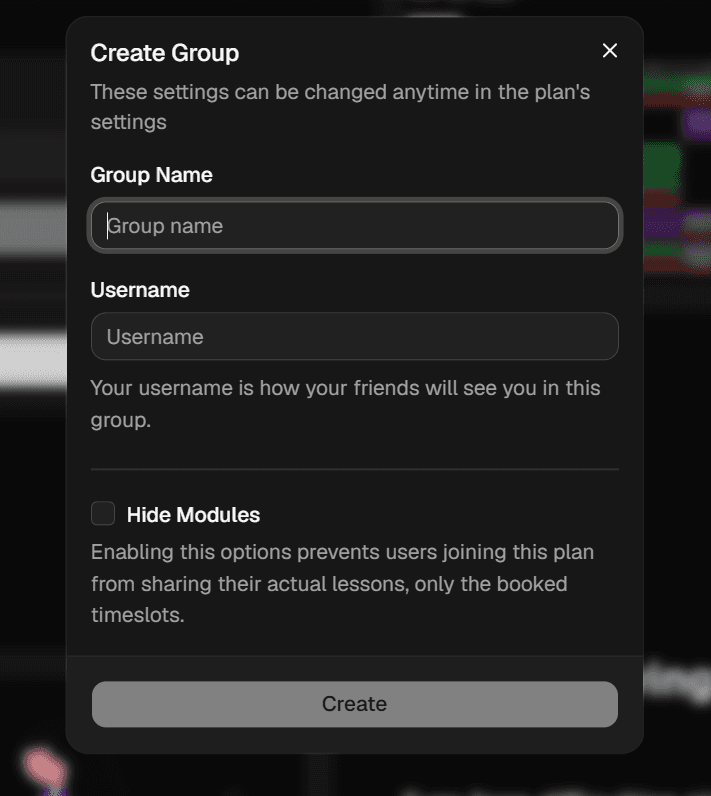
Create a new group by entering a group name and your username, and choosing whether to enable Hide Modules mode. When enabled, other members only see your booked timeslots. Your module codes and lesson details are stripped out.
How to create a group
2

Share the group

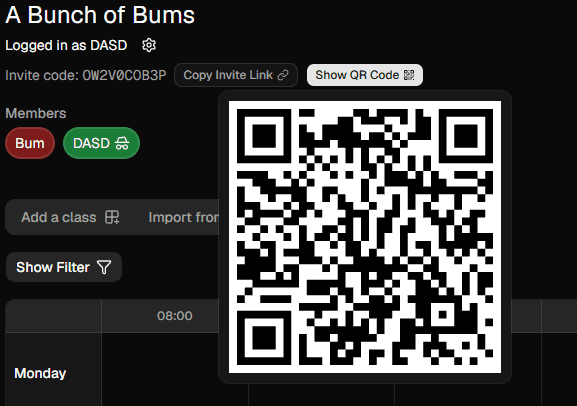
Invite your friends to the group by sending the invite code, sharing the invite link, or letting them scan the QR code. An invite code is required even for friends who only want to view the plan, not just those joining it.
How to share a group
3

Join the group

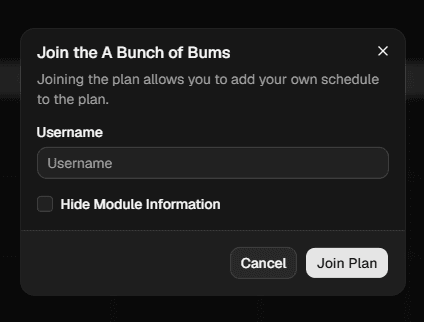
Your friends join the group by clicking the join button, entering a username, and choosing whether to share their lesson details with others. Only users who have entered a username and officially joined can add their schedules. If you've joined this group before, use the same username to continue as the same user.
How to share a group
4

Upload your schedule

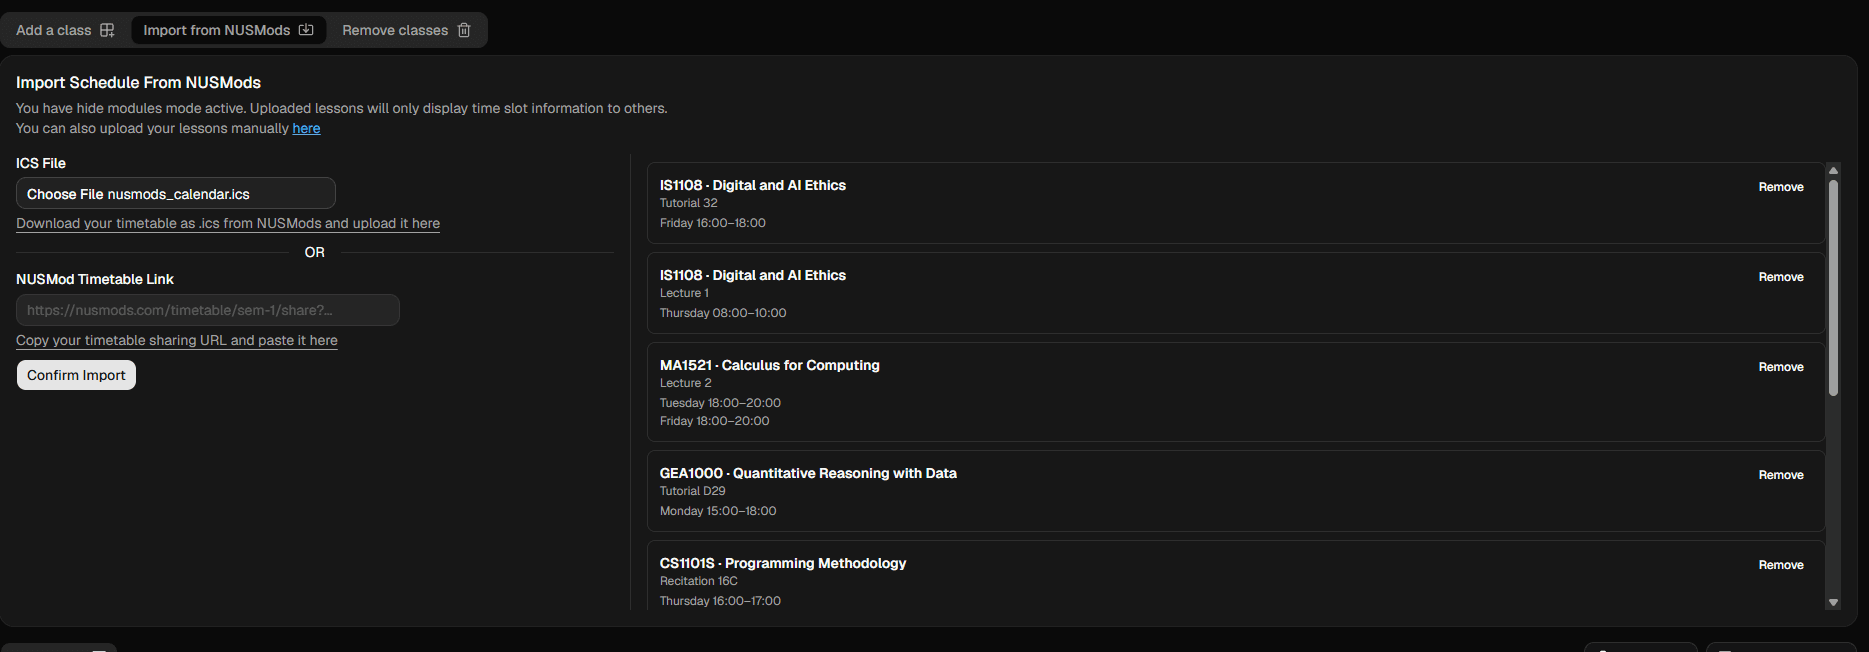
Add your classes manually, or import them from NUSMods by uploading the ICS file exported from NUSMods or pasting your NUSMods timetable link. Once uploaded, your schedule appears immediately on the shared group timetable, color-coded to you. Overlapping lessons stack side by side, and identical lessons booked by multiple members merge into a single shared cell.
Upload your schedule via NUSMods or manually
5

Filter for Free Slots

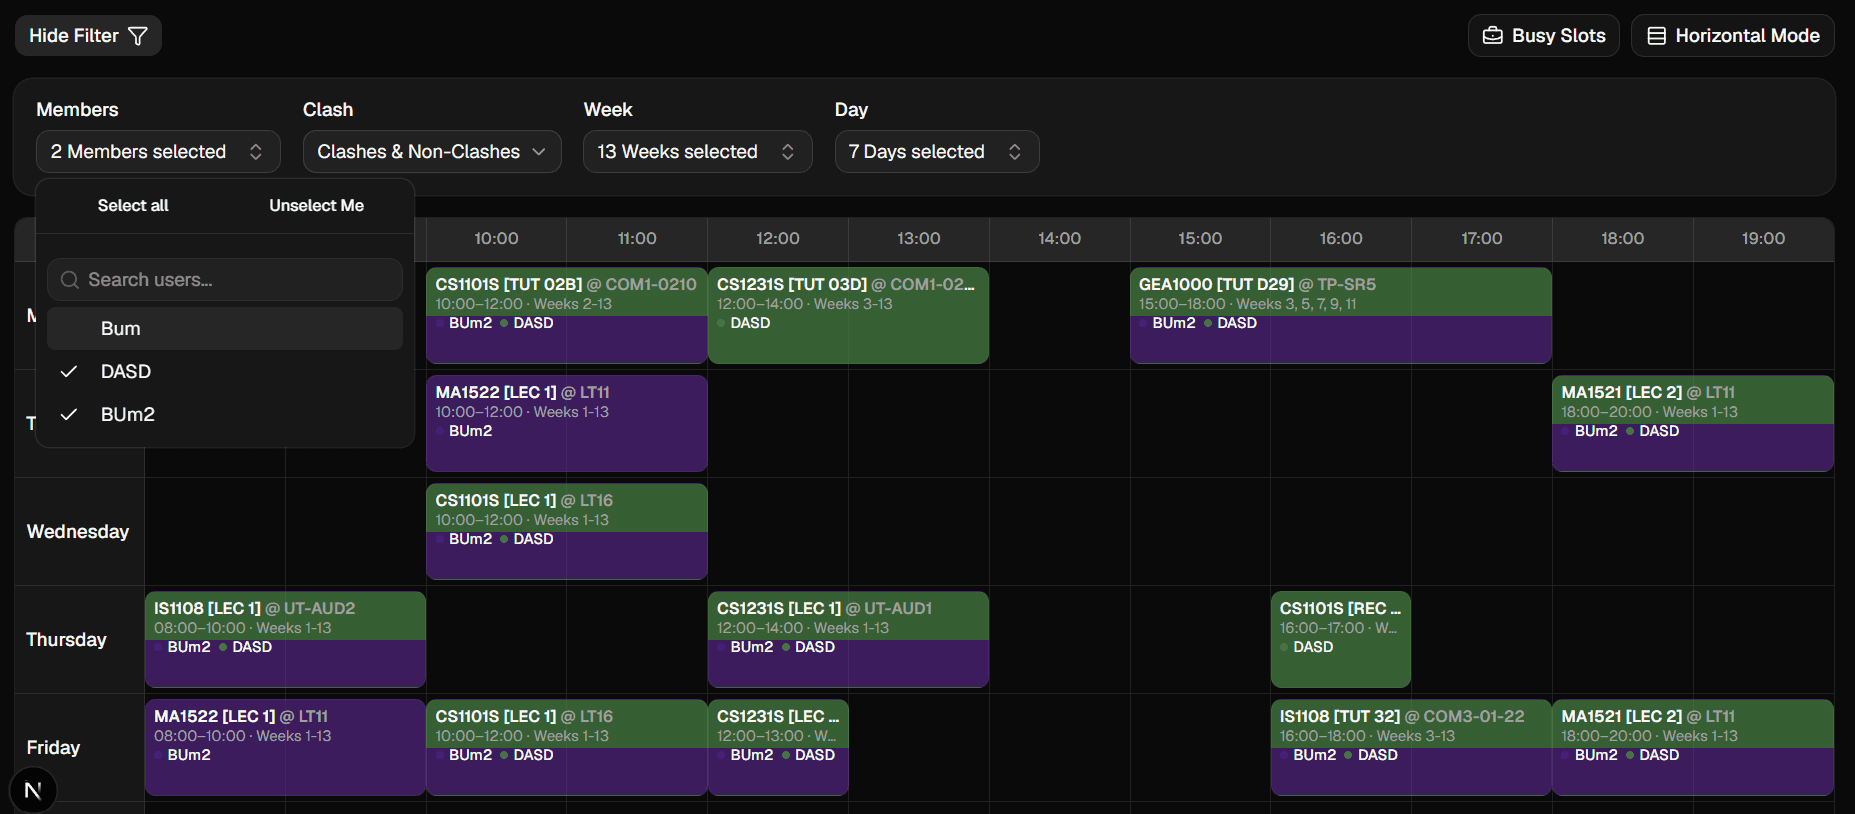
Got a big group or a complex schedule to plan around? Filter the timetable by clashes (show only clashing or only non-clashing slots), by specific members, or by day and week, to quickly narrow down suitable meeting times.
How to Filter slots
6

Change your display mode

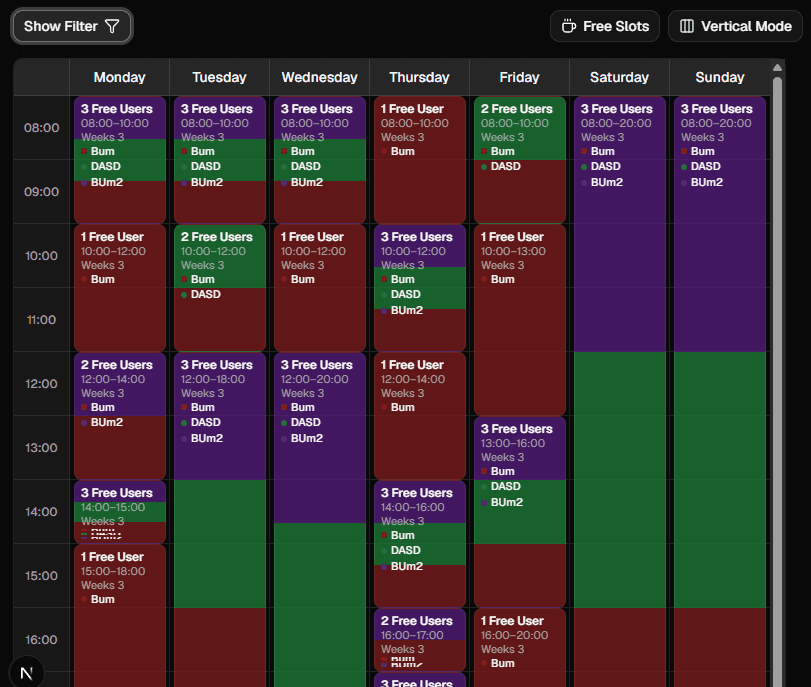
Use the toggle to show only the times everyone's free to meet, and to switch between horizontal and vertical viewing modes.
How to change display mode
Created by Zhongbob for NUS students
Not affiliated with NUSMods
Privacy PolicyFeedbackChangelog